One of my new years goals was to make one crafty project a month, and this month it was to make a notebook. So far I've made three! They're super fast and easy to make and you need to buy very few supplies, most of the things you'll probably have lying around the house somewhere! So here's my tutorial to make your very own notebook that you can personalise however you like. I should probably give you a link to the tutorial I followed and this tutorial is pretty much the same thing:
http://www.instructables.com/id/Make-a-100-page-Notebook/
Supplies needed:
- Manilla folder (or something similar)
- 50 sheets of paper (I used standard blank printer paper and I used 50 sheets which will make a 100 page notebook as the pages will be folded)
- Scissors or artists scalpel
- Ruler
- Pencil
- Cotton thread or embroidery thread
- Needle and embroidery needle (The needle is used to puncture the holes, you can also use a thumbtack or something similar)
- Hot cup of tea (optional)!
Step 1: Fold your pages in half. I had 50 pages so I folded five bundles of ten and ended up with 100 pages.
Step 2: Measure the size of your cover. Make the cover an inch or so larger than the pages. Also if your using a manilla folder, there should be three creases in the middle. You need three creases in the middle so if your card doesn't have three, make two more an inch from the centre crease. (Sorry if this sounds very confusing, hopefully you'll understand what I'm saying from the pictures below) Measure your cover not from the centre crease but from one of the outside ones. Cut card to make you cover.
Step 3: Line up all your pages with the cover, and make three marks on each. I marked them at two inches, four inches, and six inches, from the beginning of the pages not the cover. I marked the cover on the inside so the pencil marks wouldn't be visible when finished.
Step 4: On the cover where marked, make five holes at each marking. On the pages make three holes where marked. To make the holes first puncture with a needle or something similar and then go through again with an embroidery needle. It can be hard at first to make the holes in the pages, I got a few too many pricks with the needle! A thumbtack might be easier and safer and also you could use paper clips to keep the pages together and stop them from slipping.
Step 5: Line up all the pages with the cover to get ready to stitch them together. Make sure they're all matched up evenly.
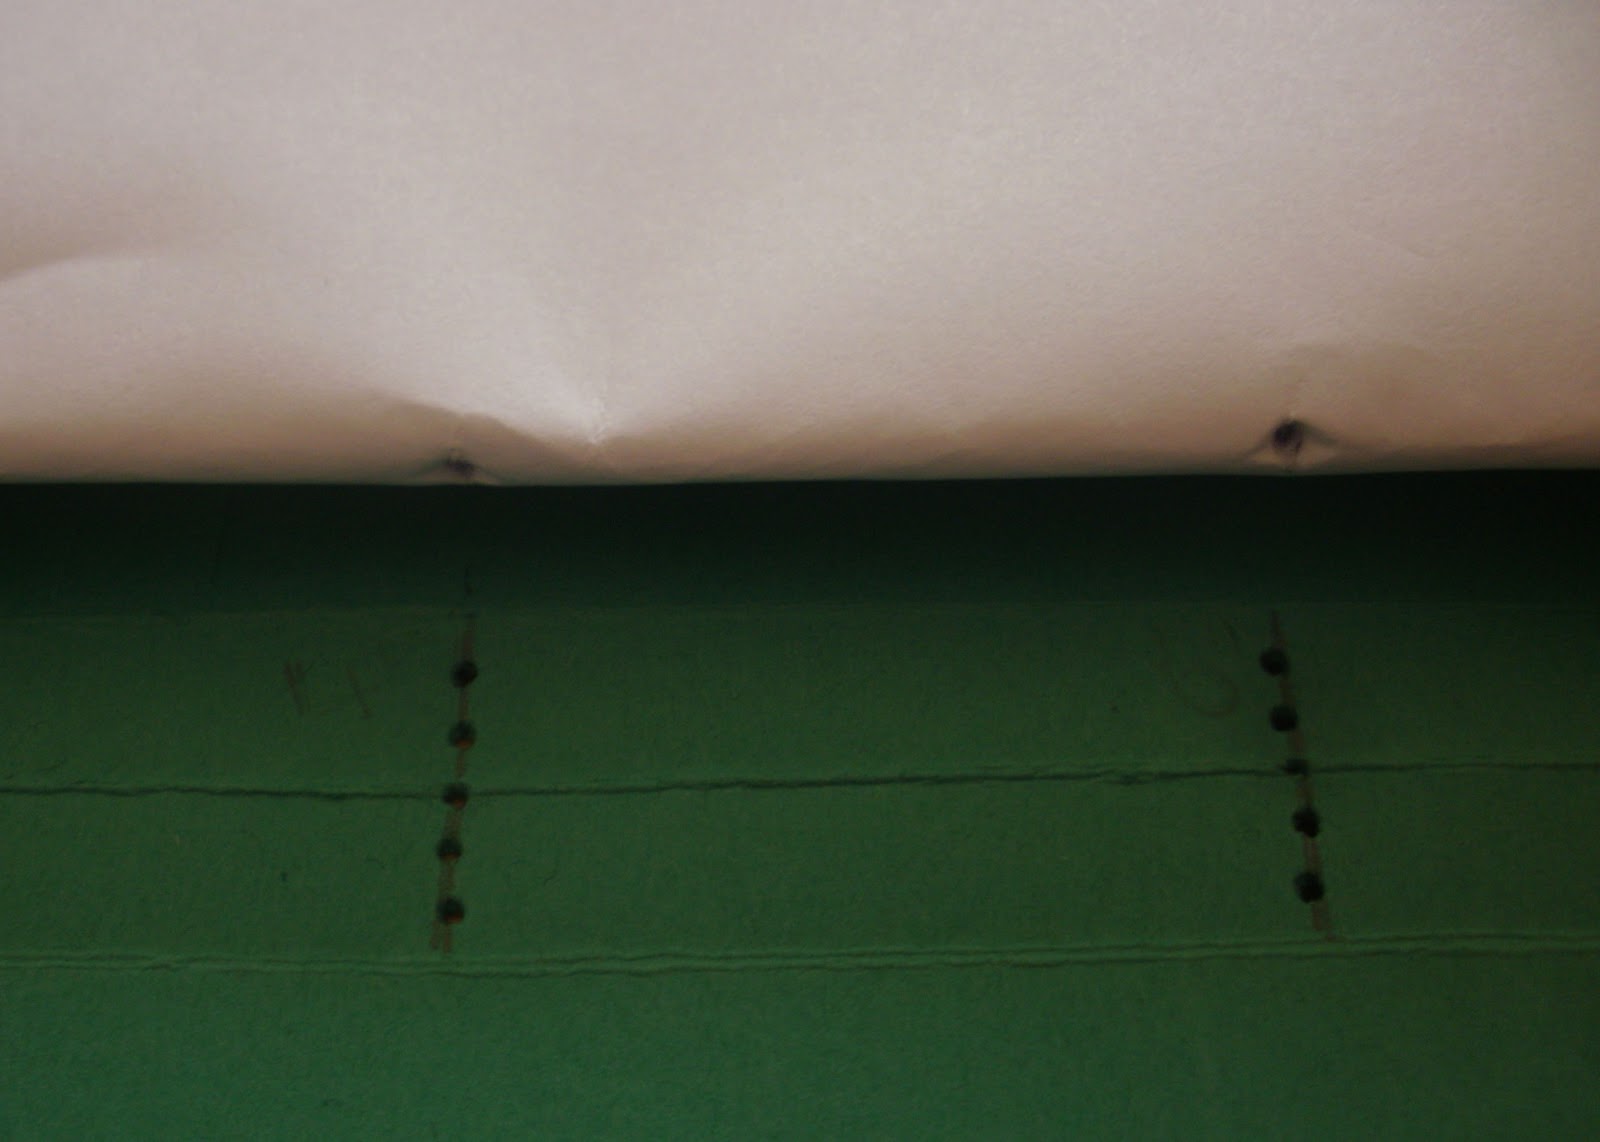
Step 6: Stitching it together! Cut 5 pieces of cotton or embroidery thread, mine were 15 inches long. Make sure you cut them long enough as you'll need enough of a tail to knot them at the end. Starting with one of your page bundles and the bottom row of holes on the cover, put your embroidery needle through the middle hole on the cover and through the middle hole on your bundle of pages.
Now from the inside put the thread through the bottom hole (as above) making sure you use the hole on the same line on the cover.Then from the outside put the thread through the top hole, then from the inside, back out the middle. It should look like the pictures below when finished. Knot the thread securely.
Repeat this with all your page bundles.
When you're finished it should look something like the picture below. You can tidy up the loose threads on the side, but make sure they're all tied securely.
Your notebook is now finished and you can decorate however you like.
I hope you've found this tutorial easy to follow, sorry if it's a bit long. If you have any questions please ask.
Thanks for reading and enjoy making your notebooks!
Jen x